


Heat Pump Installation in Happy Valley, AZ
Installing a heat pump is one of the most impactful upgrades you can make for year-round comfort and energy efficiency in Happy Valley, AZ. With long, hot summers, occasional monsoon dust, and mild winters, homes here need systems sized and installed to handle heavy cooling demand while providing reliable heating when temperatures drop.
Why a heat pump makes sense in Happy Valley, AZ
- Heat pumps provide both cooling and heating in a single system, which is ideal for the region’s climate where cooling dominates but heating is needed on cooler nights.
- Modern high-efficiency units deliver strong SEER/HSPF performance, lowering operating costs during long cooling seasons.
- Proper installation and placement reduce exposure to dust and debris during monsoon season and help resist efficiency losses caused by extreme outdoor temperatures.
Common heat pump installation types and issues in Happy Valley, AZ
- Replacement of an aging central air system with a heat pump for year-round comfort.
- Conversion from separate AC and furnace systems to a single heat pump to simplify maintenance and improve efficiency.
- Ductless mini-splits for additions, garages, or homes without existing ductwork.
- Common local issues: undersized equipment for high cooling loads, improper outdoor unit siting that increases dust intake, inadequate refrigerant charge or airflow, and insufficient electrical capacity at older homes.
Initial consultation and load calculation
The installation process begins with an on-site consultation and a detailed load calculation (Manual J). This step determines:
- Exact cooling and heating loads based on home square footage, insulation, window orientation, ceiling height, and roof color.
- Local factors like persistent solar heat gain in west- and south-facing rooms and infiltration during monsoon season.
- Duct condition and distribution capability for central systems.
A precise load calculation prevents oversizing or undersizing. Oversized units cycle frequently and reduce efficiency and comfort; undersized units struggle during heat waves.
Equipment selection and sizing
Equipment is chosen to match the calculated load and homeowner priorities:
- Central heat pumps vs. ductless mini-splits: central systems for whole-home comfort; mini-splits for zone-specific control or homes without ducts.
- Efficiency ratings: SEER for cooling, HSPF or COP for heating — higher ratings generally mean better savings in Happy Valley’s cooling-heavy climate.
- Refrigerant type and future-proofing: modern systems use EPA-approved refrigerants. Selection considers availability of service and long-term regulations.
- Ancillary components: variable-speed blowers, matched coil and condenser, line set lengths, and compatible smart thermostats or zoning controls.
Site preparation
Proper site prep protects performance and lifespan:
- Outdoor unit placement on a level, elevated pad to avoid flooding from rare heavy rains and to reduce dust accumulation.
- Clearances for airflow and service access, shaded locations when possible to reduce heat soak, and secure mounting to limit vibration transfer.
- Indoor preparation may include duct sealing, return and supply balancing, or routing for new refrigerant lines and electrical conduits.
Professional installation steps
A typical installation workflow includes:
- Safely disconnecting and removing the old equipment, including reclaiming refrigerant per regulations.
- Installing the outdoor condenser and indoor air handler or evaporator coil, ensuring proper mounting and support.
- Running refrigerant lines, condensate drain, and communication wiring with the correct slopes and insulation.
- Connecting the dedicated electrical circuit, disconnect box, and properly sized breakers. Verifying service panel capacity and recommending upgrades if needed.
- Installing and sealing duct transitions or mounting mini-split heads with proper clearances.
Electrical and refrigerant hookups
- Electrical work includes installing a dedicated circuit, disconnect, and grounding per local electrical codes. Older homes may require a service panel upgrade to handle modern heat pump loads.
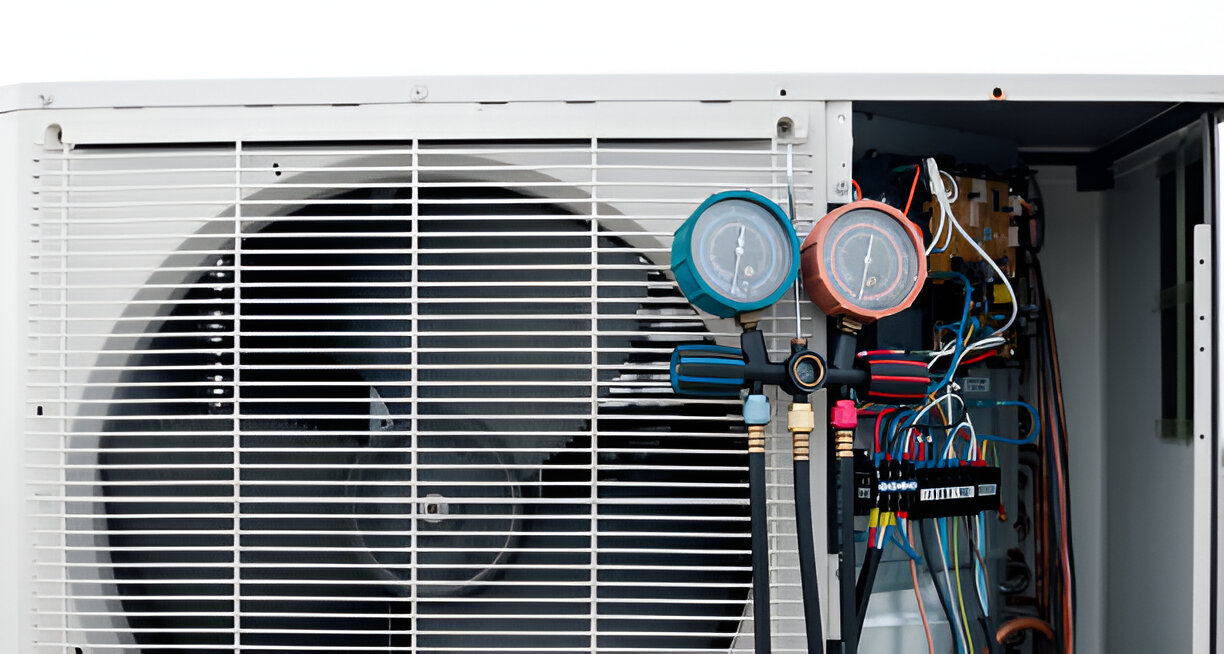
- Refrigerant work follows strict charging protocols: evacuation of the system to remove moisture, precise refrigerant charge based on weight and superheat/subcooling measurements, and leak testing. Technicians use approved refrigerants and proper recovery equipment.
System commissioning and performance testing
Commissioning verifies the system operates to specification:
- Measure airflow, static pressure, supply and return temperatures, and verify proper blower speeds.
- Check refrigerant pressures, superheat, subcooling, and compressor performance.
- Confirm thermostat calibration, system cycle behavior, and defrost function in heat mode.
- Inspect condensate drainage and verify all safety controls and sensors function correctly.
- Provide a final performance summary showing expected vs. measured operation.
Thermostat integration and zoning options
- Smart thermostats: integrate for scheduling, remote control, and energy monitoring. Compatibility with heat pump controls is verified during selection.
- Zoning: for two-story homes or varying occupancy patterns, zoning dampers and multiple thermostats allow different temperature setpoints per area, improving comfort and reducing energy use.
- Multi-zone mini-splits provide independent control per room with high efficiency and minimal ductwork.
Permits and code compliance
- Installations in Happy Valley follow local building and electrical codes and require permits and inspections. Proper permitting ensures safety, correct wiring, refrigerant handling, and compliance with efficiency standards.
- Documentation prepared for inspection includes cut sheets for equipment, load calculations, wiring diagrams, and refrigerant charging records.
What customers can expect on install day
- A clear arrival window and crew introduction, minimal disruption through drop cloths and work-area protection.
- Typical full-day timeline for a standard split-system replacement; larger or more complex installs may require multiple days.
- Removal and responsible disposal or recycling of old equipment and refrigerant reclaim handled on-site.
- Final system walkthrough demonstrating thermostat operation, maintenance basics, filter replacement, and any warranty or service registration paperwork.
Long-term benefits and maintenance advice
A professionally installed heat pump delivers consistent comfort and lower energy use when matched and commissioned correctly for Happy Valley conditions. Regular maintenance keeps performance high: scheduled cleanings, filter changes, annual tune-ups, refrigerant checks, and duct inspections are recommended, especially after dusty monsoon seasons.
Proper equipment selection, precise installation, and thorough commissioning are the difference between an average system and one that reliably withstands Happy Valley’s heat while operating efficiently for years.
Financing
_11zon%20(1).webp)


Customer Testimonials
